Replacing your rubber track in 10 steps
When your crawler rubber tracks has stretched, the profile has faded or when the rubber track is even torn, it is necessary to replace your track as soon as possible. The replacement of your rubber track is something you can do yourself. It is not the most difficult thing to do, but to prevent damage to your machine, it is very important that it is done properly. In the 10 steps below, we will show you how to disassemble your current rubber track and install the new one.
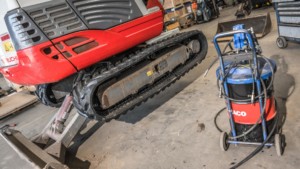
Step 1: Good preparation
Make sure your machine is on a solid surface. Lift the machine with the blade and the boom, so you can reach everything easily. It is wise to clean the undercarriage before you start. You can do this by spraying the undercarriage, or clean it with a broom.
Step 2: Remove the inpection hatch

Remove the inspection hatch of the undercarriage, this is where the grease nipple is that closes the grease cylinder.
Together with the tension device, the grease cylinder makes sure the rubber tracks remains on the right tension. There may be some sand in the frame. Try to remove this sand as much as possible.
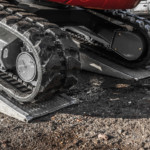
Step 3: Place the idler
To remove the rubber track, the idler has to be pushed in the undercarriage. The grease has to be pushed out of the cylinder for this. There are two ways to do this:
- Go stand on the bottom of the track and move up and down a couple of times. By doing this, a large amount of grease will fall on the inside of the bottom of the track.
- When this does not work, you can place a wooden beam between the track and the sprocket, and turn the motor on gently. The beam will turn along with the sprocket. The grease cylinder is now being emptied, the idler is being pushed inside and the rubber track rests loosely on the undercarriage.
Step 4: Remove the track
Lower the machine until the bottom of the rubber track is on the ground. You can now easily remove the idler yourself. When you slightly turn the rubber track to the side, the sprocket will also slide off easily.
Step 5: Check your other undercarriage parts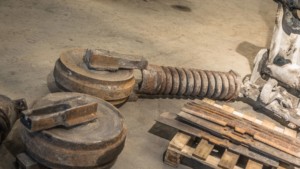
The top and bottom rollers, idler and sprocket are now clearly visible. Now is an excellent time to also check your other undercarriage components for wear, breaks or play. Is one of the undercarriage parts worn out? Replace them to prevent damage to your machine in the near future.
When the tension device is worn out it is important that you never unscrew it just like that. The tension device is under a lot of tension. If you unscrew it, it could come loose and seriously injure you or someone in your surroundings.
At VemaTrack, you can find all the undercarriage parts you are looking for. So, do you want new top rollers, bottom rollers, idlers or sprockets? Please contact us and we will help you.
Step 6: Assemble your new undercarriage parts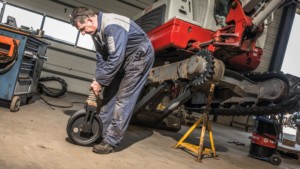
Clean the inside of the frame before your reassemble everything. Clean the grease nipple en screw it back on the grease cylinder. First, you slide the grease cylinder back on, then the idler. Also, check the tension between the frame and the fork of the idler. When there is minimal clearance, it is okay. When the fork chatters in the frame, it is too loose. You can place a couple of metal strips into the frame.
Step 7: Replace your sprocket
We recommend you to also replace your sprocket when you assemble a new rubber track. Otherwise, the inserts of your new track can wear out more and faster, and there is a greater change that the tracks will tear.
First, unscrew all the bolts from your sprocket. There is a good chance that the sprocket will fall out. Otherwise, you can use the wooden beam again.
Check the dimensions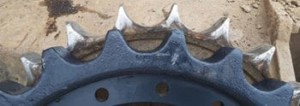
You can order the right sprocket for your machine at VemaTrack. It is important that the diameter, number of teeth and the offset of the new sprocket are all the same to the current sprocket. When there is a difference in this, the track will drift off center and may run off the machine. This will cause damage to the rubber track.
You can check the offset by placing a metal slat on the side of the sprocket with the final drive. You can measure the distance with a tape measure or ruler. There should be a maximum difference of one millimeter.
Step 8: Thoroughly clean the final drive 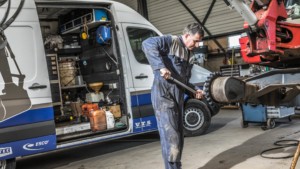
Due to rust and the effects of dirt, the old sprocket was probably stuck on the final drive. There is a chance that the connection will not be exactly right anymore when assembling the new sprocket. Eventually, the bolts will loosen.
Therefore it is important to thoroughly clean the contact surfaces of the final drive before assembling the sprocket, with sandpaper or a wire brush. In order to create the perfect contact surface, it is also necessary to remove the paint layer from the new sprocket.
You can apply a little loctite on the bolts of the sprocket to prevent loosening. You can tighten the bolts at first by hand and then with a torque wrench.
Step 9: Assemble the new rubber track
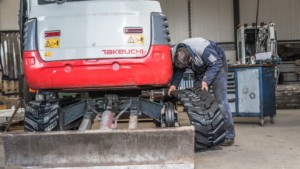
You can now assemble the new rubber track onto your machine. It is easier to get the help of a colleague for this. The lug must point towards the idler when installing. Firstly, place the rubber tracks around the sprocket. Then, the other person pulls the track over the idler on the other side. After that, you lift the sagging track over the frame of the undercarriage, with, for example, a metal rod.
After some fitting, the sprocket teeth will fall right into the inserts of the rubber track.
Step 10: Tensioning the rubber track
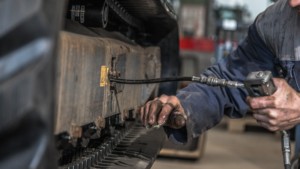
Raise the machine, so the track is completely clear from the ground. You can re-tension the track by injecting grease into the grease cylinder. The more grease gets into the cylinder, the more the idler slides out and the rubber tracks tightens.
The correct tension of the rubber track can be found in the manual of the machine. The tension of the rubber track is the distance between the bottom of the balk and the inside of the rubber track. You can measure this with a tape measure.
Warning: the rubber track may never be too tight! That will increase the risk of wear.
When the new rubber track is on the right tension, it is mounted to the undercarriage, and is ready to use again!
Do you have any questions about how to replace/change your crawler track? Please feel free to contact us.
PRODUCTS THAT GET THE JOB DONE

Sprockets &
Segments

Track links

Bottom &
Top rollers

Track shoes

Rubber tracks

Rubber pads

Idlers

Tension devices

Track guards

Bucket teeth &
Wear parts

Bolts & Nuts

Complete undercarriages